4 Coolest Power BI Tutorial Sites For Beginners

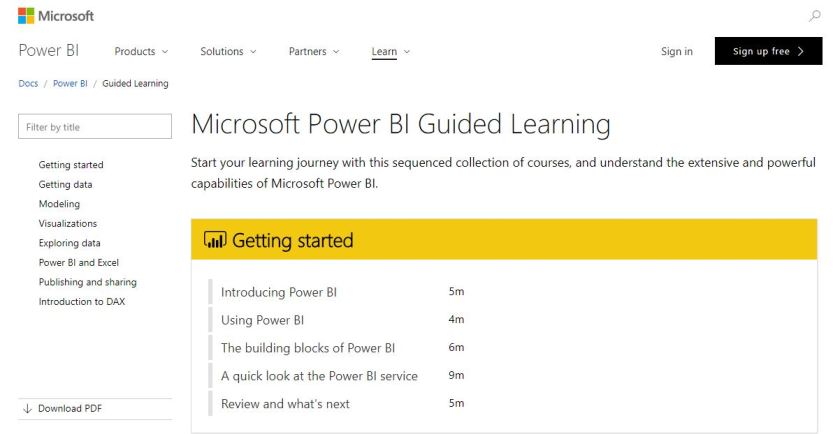
1. Power BI Guided Learning

This is the Power BI official channel. When following this one, you will find many Power BI tutorial videos as well as documentations. You can also use the sample database like AdventureWorks in Power BI desktop then do the trial and error using that database in all visuals. Moreover, you can learn about the tools and other available options in PowerBI desktop through the website. Here’s a protip: work your data on excel before using PowerBI – you’ll save a lot of time.
1


2. Microsoft Virtual Academy

This site provides hundreds of free courses which are designed for Developers, IT Pros, Data Pros, and Students. The topic is diverse, from Cloud Development to Visual Studio to Mobile Development, and more. This site is an excellent way to stay up to date on the latest Microsoft technologies which include Power BI tutorial.  The new course is updated weekly!

2


3. Analyzing and Visualizing Data with Power BI

This course is a part of the Microsoft Professional Program Certificate in Big Data and the Microsoft Professional Program Certificate in Data Science. It will walk you through Power BI, from the basic knowledge i.e how to connect to and import your data, to the advanced level i.e. how to author reports using Power BI Desktop and publish those reports to the Power BI service. The series of short, lecture-based videos are accompanied by demos, quizzes, and hands-on labs to test your knowledge. This free EDX online course is definitely a great resource for learning Power BI.

3


4. Microsoft Technet 

On this website, you can find everything related to Power BI such as key resources, tutorials, case studies and many more. Technet forum is also the best place for you to exchange ideas with Power BI users and gain more knowledge from many Microsoft experts.

4


http://niftit.com/get-power-bi-tutorial/

The Coding Naming Convention

How to make your colleagues’ lives easier while reviewing your codes?

– Please just follow the naming convention.

For me personally following the Naming Convention is a basic manner and a friendly way to treat someone who will read your code. It reflects that you have attention to detail and logical thinking. It’s also one of the criteria to determine your coding quality.

My training manager had said something about this, ‘I will see whether you are a professional developer even your code doesn’t even work’.

Some bad examples and some tips:

  • Do not give full and descriptive names. eg. FController or FinController instead of FinanceController. Avoid using unknown acronyms is necessary.
  • Pascal Casing is important. E.g. ProductCategory, ChildProgram
  • Do not provide comments on the code which may look confusing. Provide comments on your assumptions is effective.
  • Use new lines to indicate a new logical group.
  • Always Indent the code properly
  • Use Ctrl+K+D to auto-indent your code in Visual Studio.
  • Retain consistency in styles.

Install AdventureWorks2014 and AdventureWorksDW2014 Step by Step

Before installation, please download 2 sample databases from below,


1

Open SQL Server Management Studio, Right click on “Databases”, select “Restore Database”,

2
Select “Device” and click button on the right,

3
Click “Add” button,

4
Select AdventureWorks2014.bak, click “OK” button.

5
Click “OK” button

6
Click “OK” button.

7
AdventureWorks2014 has been installed.

Please refer above steps to install AdventureWorksDW2014, it’s exactly the same steps.


Installing SQL Server 2016 Developer Edition and SQL Server Management Studio Step by Step

Installing SQL Server 2016 Developer Edition

First, you need SQL Server 2016 Developer Edition. Here is a link of how to get SQL Server 2016 Developer Edition for free: SQL Server 2016 Developer Edition is Free.

Once you have SQL Server 2016 Developer Edition, start the installation by executing setup.exe. SQL Server Installation Center starts:

1

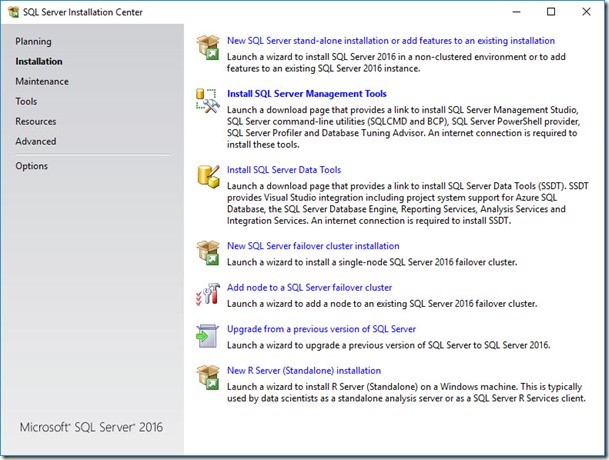
Click the Installation page:

2

Click the link labelled “New SQL Server stand-alone installation or add features to an existing installation”:

3

Accept the defaults on the Product Key page – Developer Edition and no product key, then click the Next button:

4

On the License Terms page check the “I accept the license terms” checkbox and click the Next button:

5

If the Install Rules page tests pass, click the Next button to proceed:

6

On the Feature Selection page, select the features you want to install and a location for the instance root files. I installed the Database Engine Services, Analysis Services, Reporting Services – Native, Integration Services, and Client Tools Connectivity, Client Tools Backwards Compatibility, Master Data Services. Click the Next button to proceed:

7

On the Instance Configuration page select default instance if it’s your first time installing SQL Server, otherwise select Named instance and give an instance name and clicked the Next button:

8

On the Server Configuration page, I accepted the defaults for services and startup types:

9

On the Database Engine Configuration page, I opted to use Mixed Mode, supplied a strong password, and added the current user to the SQL Server Administrators group.

10

On the Analysis Services Configuration page, select Multidimensional and Data Mining Mode (from where you can also see Tabular Mode and PowerPivot Mode), and click Add Current User, then click Next button:

11

On the Reporting Services Configuration page, select install only, then click the Next button:

The Ready to Install page displayed; I clicked the install button to begin the installation.

12

Installing SQL Server Management Studio

Once the installation completed, I clicked the “Install SQL Server Management Tools” link on the SQL Server Installation Center’s Installation page:

13

The link takes me to a page titled Download SQL Server Management Studio.

14

Once the download is complete, click the Run button to install SSMS 2016:

15

The SQL Server Management Studio (SSMS) installation starts:

16